![[ Substance 3D Painter ] How to create Curvature (Edge wear)](https://www.plamophy.com/wp-content/uploads/substance3dpainter-ec-painting-curvature-01.png)
Substance 3D Painter allows you to enable various effects by baking.
One of these effects is Curvater, which allows you to make edges stand out.
In this article, I would like to introduce how to create Curvature (Edgeware). Also, I would like to check how to blend using materials from Assets.
How to create Curvature (Edge wear)
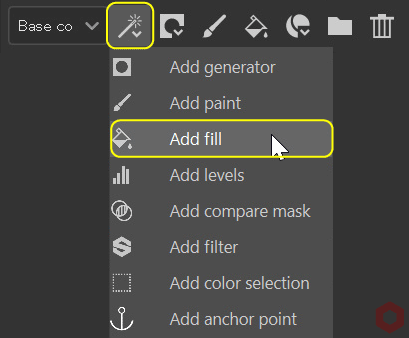
First, add a fill layer.
- Click the [ Add Fill layer ] icon to add a fill layer.
![]()
Set the base color, texture, etc. of Curvature (Edge wear).
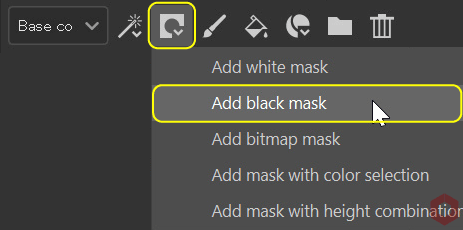
For more information on fill layers, please see this page. - Click the [ Add mask ] icon and select [ Add black mask ].
![]()
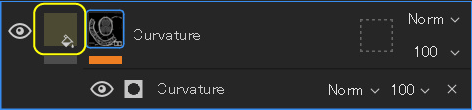
- Click the [ Add effect ] icon and select [ Add generator ].
![]()
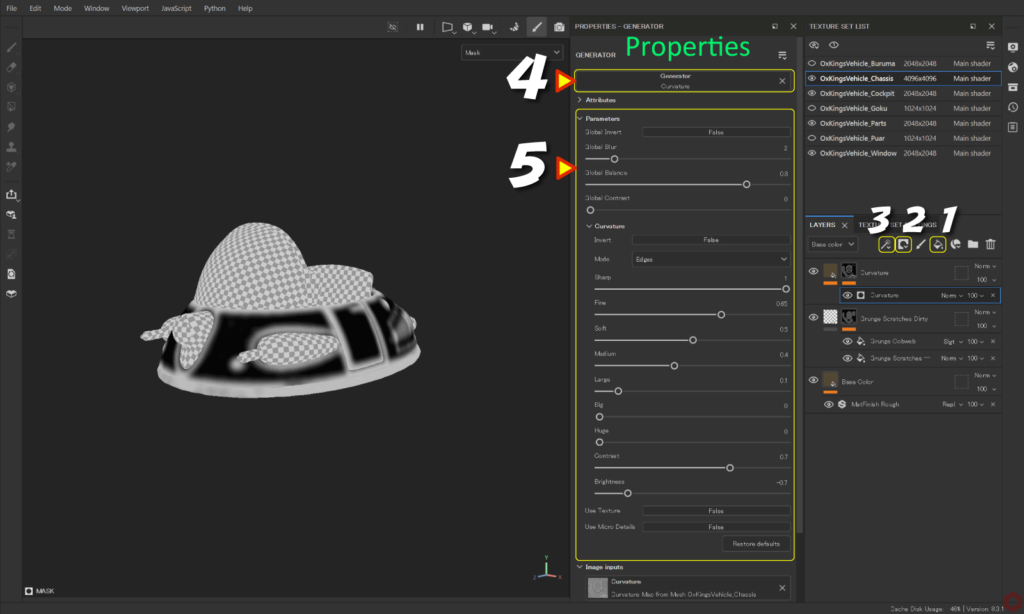
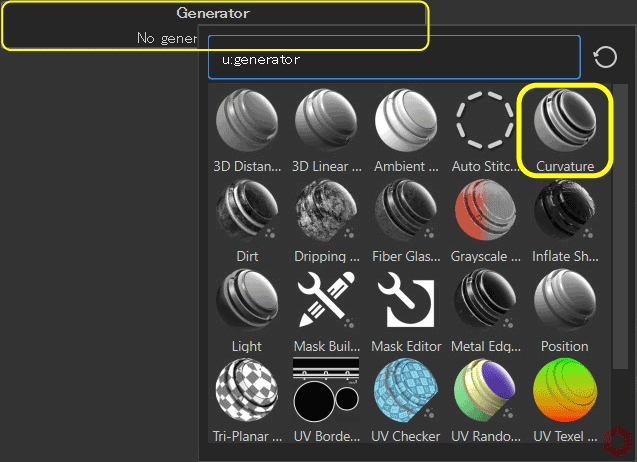
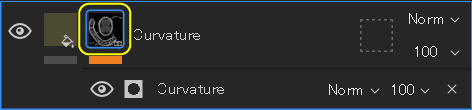
- Click the [ Generator ] button and select [ Curvature ].
![]()
- Adjust the parameters to adjust the edges.
- You can go back to the fill layer and readjust the color, roughness, etc.
![]()

In addition to [ Curvature ], there is also [ Metal Edge Wear ] as a Curvature (Edge wear) generator.
This will give you a sharper edge.
About blending method
- With the mask selected,
![]()
Click the [ Add effect ] icon and select [ Add fill ].![]()
![]()
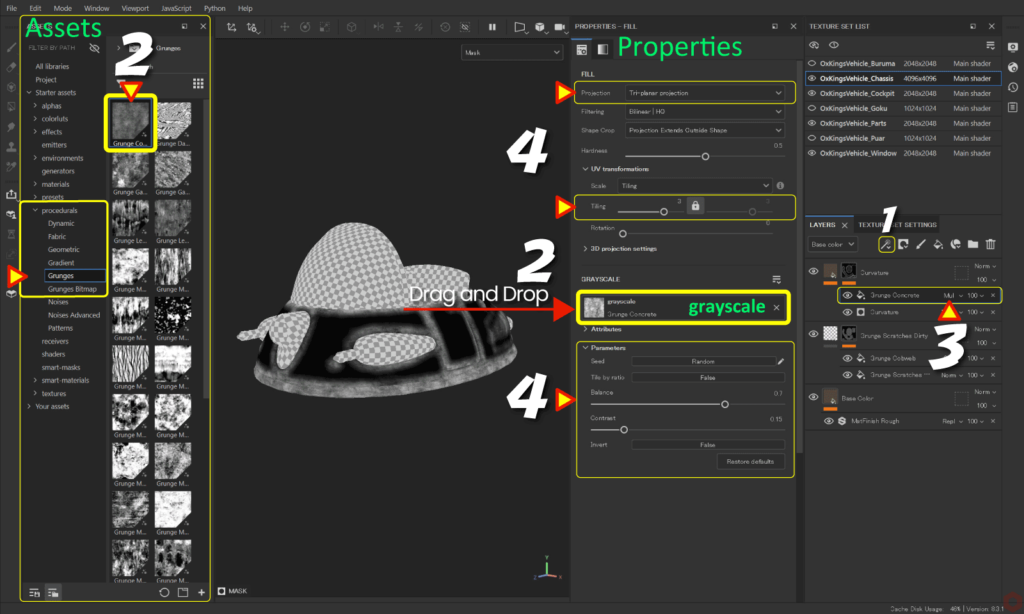
- From [ Assets ], select [ procedurals > Grunges ],
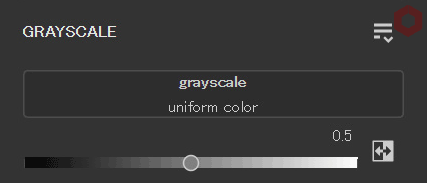
Drag and drop any grunge material onto [ grayscale ].![]()
Example: Here I am using [ Grunge Concrete ]. - Change blend mode.
![]()
Example: Here we use [ Multiply ]. - Adjust parameters, change texture projection method, adjust position, and adjust tiling.
Example: Here, the projection method is set to Tri-planar projection.


Adjusting parameters will be easier if you check the status while switching between the mask channel and roughness channel with the [ C ] key.
Press the [ M ] key to return to the original state.
Summary
We have confirmed how to create Curvature (edge wear).
You can bring out the texture of the material even more by adjusting the edges!
On the next page, we'll see how to create the generator Dirt!
Next page Let’s go!
![[ Substance 3D Painter ] How to adjust roughness using grunge material](https://www.plamophy.com/wp-content/uploads/substance3dpainter-ec-painting-roughness-add-01-300x125.jpg)
![[ Substance 3D Painter ] How to create the generator Dirt](https://www.plamophy.com/wp-content/uploads/substance3dpainter-ec-painting-dirt-01-300x125.png)
![[ Introduction to Substance 3D Designer ] Basic steps to output to Substance 3D Painter](https://www.plamophy.com/wp-content/uploads/substance3ddesigner-ec-camouflage-01-150x150.jpg)
![[ Substance 3D Painter ] Bake procedure and common settings](https://www.plamophy.com/wp-content/uploads/substance3dpainter-ec-baking-mode-01-150x150.png)
![[ Substance 3D Painter ] How to create decals](https://www.plamophy.com/wp-content/uploads/substance3dpainter-ec-painting-decal-01-150x150.jpg)
![[ Substance 3D Painter ] How to bake to change resolution and cage for each Texture Set](https://www.plamophy.com/wp-content/uploads/substance3dpainter-ec-baking-mode-syncparameters-01-150x150.jpg)
![[ Substance 3D Painter ] マテリアル、テクスチャのインポート方法](https://www.plamophy.com/wp-content/uploads/substance3dpainter-ec-resource-import-01-300x125.jpg)
![[ Substance 3D Painter ] ベイクの手順と共通設定](https://www.plamophy.com/wp-content/uploads/substance3dpainter-ec-baking-mode-01-300x125.png)
![[ Substance 3D Painter ] テクスチャエクスポートの設定方法](https://www.plamophy.com/wp-content/uploads/substance3dpainter-ec-export-textures-01-300x125.jpg)
![[ Substance 3D Painter ] 半透明マテリアルのシェーダー設定方法](https://www.plamophy.com/wp-content/uploads/substance3dpainter-ec-shader-settings-alpha-blending-01-300x125.png)
![[ Substance 3D Painter ] ペイントブラシの設定方法](https://www.plamophy.com/wp-content/uploads/substance3dpainter-ec-painting-brush-setting-01-300x125.jpg)
![[ Substance 3D Painter ] シンメトリーを使用したペイント方法](https://www.plamophy.com/wp-content/uploads/substance3dpainter-ec-painting-brush-symmetry-01-300x125.jpg)
![[ Substance 3D Painter ] ポリゴン塗りつぶしツールを使用したマスキング方法](https://www.plamophy.com/wp-content/uploads/substance3dpainter-ec-masking-polygon-fill-01-300x125.jpg)
![[ Substance 3D Painter ] 色相の変更とグラデーションの作成方法](https://www.plamophy.com/wp-content/uploads/substance3dpainter-ec-painting-color-variations-01-300x125.jpg)
![[ Substance 3D Painter ] 環境マップの設定と明るさの調整方法](https://www.plamophy.com/wp-content/uploads/substance3dpainter-ec-display-settings-01-300x125.jpg)
![[ Substance 3D Painter ] レンダリングの設定項目](https://www.plamophy.com/wp-content/uploads/substance3dpainter-ec-rendering-01-300x125.jpg)

![[ Introduction to Substance 3D Designer ] Basic steps to output to Substance 3D Painter](https://www.plamophy.com/wp-content/uploads/substance3ddesigner-ec-camouflage-01-300x125.jpg)
![[ Unreal Engine 5.3.1 ] How to use Procedural Content Generation (PCG)](https://www.plamophy.com/wp-content/uploads/unrealengine-ec-pcg-01-300x125.png)
![[ Substance 3D Painter ] How to use the stencil](https://www.plamophy.com/wp-content/uploads/substance3dpainter-ec-painting-brush-stencil-01-300x125.jpg)